How to factory restore a ZimaBoard
I've recently been playing around with ZimaBoard, a single board server running Debian and CasaOS. It's a cool little machine, but I accidentally broke something and had to factory reset. It's not a simple option in a some settings menu, the process involves flashing an image on the ZimaBoard, so I wrote down the steps I took.
Table of Contents
About the ZimaBoard
ZimaBoard is a “hackable” x86 single board server, by default it comes running Debian and CasaOS, and is meant to be the hub of your personal self-hosted cloud. Through a simple web GUI you can install and manage different apps and services as Docker containers. The ZimaBoard 232 specifically has a Intel Celeron dual core N3350 CPU with integrated graphics and 2 GB of DDR4 RAM. The higher end 432 and 832 models have better Celeron CPUs and more RAM. All the models have a 32 GB eMMC and two SATA ports for more storage, two USB 3.0 ports, two gigabit ethernet ports and even a PCIe 2.0 x4 port. The 12V charger sips power at around 5 to 6 watts.
Pre-requisites
Installing any image will require a USB drive (here’s an 8gb one for $5 on Amazon) and a monitor to use the installation GUI. Since the ZimaBoard has no HDMI port, only a Mini-DisplayPort 2.0 port, a Mini DisplayPort to HDMI adapter cable is required. I used this one from Amazon for $9.
Downloading image and creating bootable USB
I’m generally following the official ZimaBoard CasaOS Factory Recovery instructions with only a few changes. Basically, we must download the image that comes installed on Zimaboard and flash it on the ZimaBoard using a bootable USB drive.
I have the ZimaBoard 216, so I used the ZimaBoard 216 image. There is a separate image for ZimaBoard 432 and 832 if you have one of those instead.
For this guide I will create the bootable USB drive on a Windows machine, using Rufus. Another alternative is BalenaEtcher as suggested by the official Zimaboard instructions. Rufus and BalenaEtcher are both free and open-source.
If you want to create a bootable USB on Linux, check out Ventoy, or use command
dd if=<PATH TO ISO FILE> of=/dev/*** bs=8M status=progress(Make sure to the USB device as it appears on your machine, for example/dev/sdd, or you could overwrite an HDD!)
Once you have downloaded the image, plug into your PC a USB drive with 8 GB or more capacity, run Rufus as Administrator, and the USB drive should appear under Devices, otherwise select it from the dropdown. Under boot selection, click the Select button to the right, navigate to and select the image file, and click Open. Leave all options at default and click the Start button at the bottom.
You may get a warning about the image, ignore it. You should get prompted to write the image either in ISO or DD mode — I had to choose DD mode for the Zimaboard to recognize the image, in my experience Debian always needs DD mode to flash the ISO. Once the image is done writing, you can close Rufus and remove the USB drive.
Installing the image on ZimaBoard
Plug the USB drive into one of the ports on the ZimaBoard, and also plug a keyboard on the other USB port, you’ll need it. Then plug in the ZimaBoard’s power cord.
When it starts booting up immediately start mashing F11 on your keyboard and you’ll be presented with a menu to please select boot device, scroll down to the USB drive and press the Enter key.
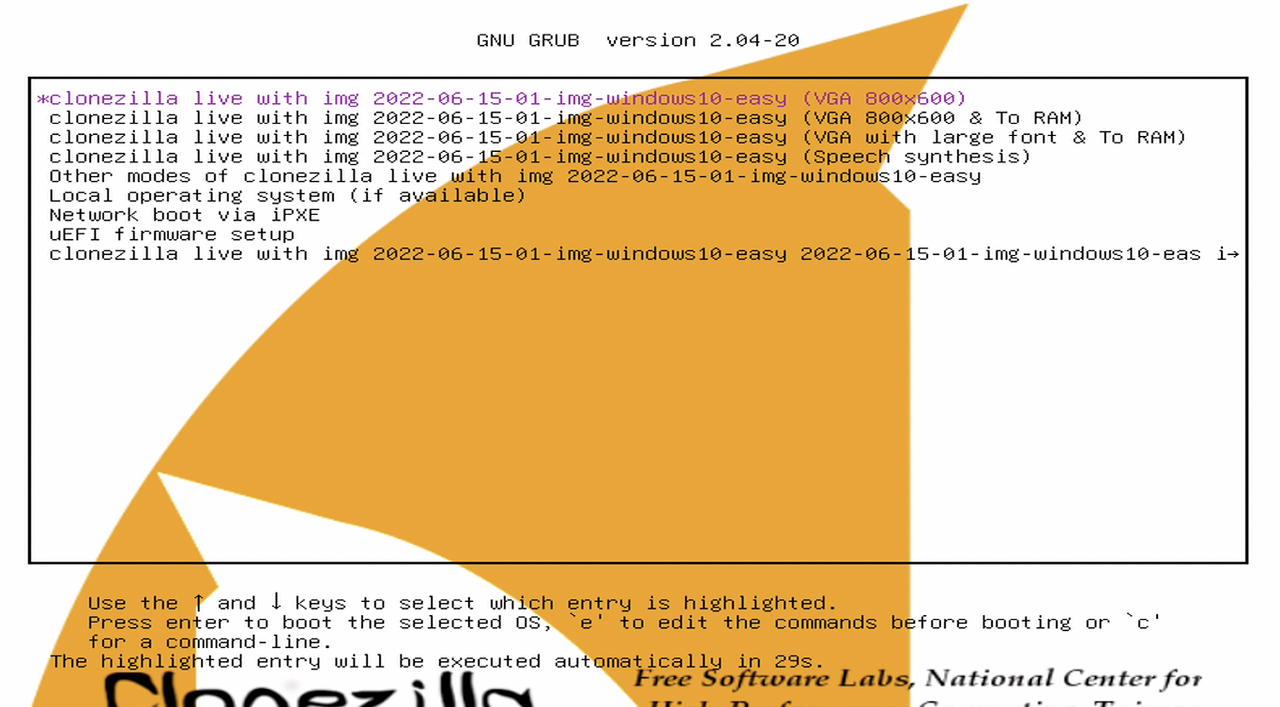
After a moment you’ll see the Clonezilla GUI — choose the first option (VGA 800x600) and hit Enter.

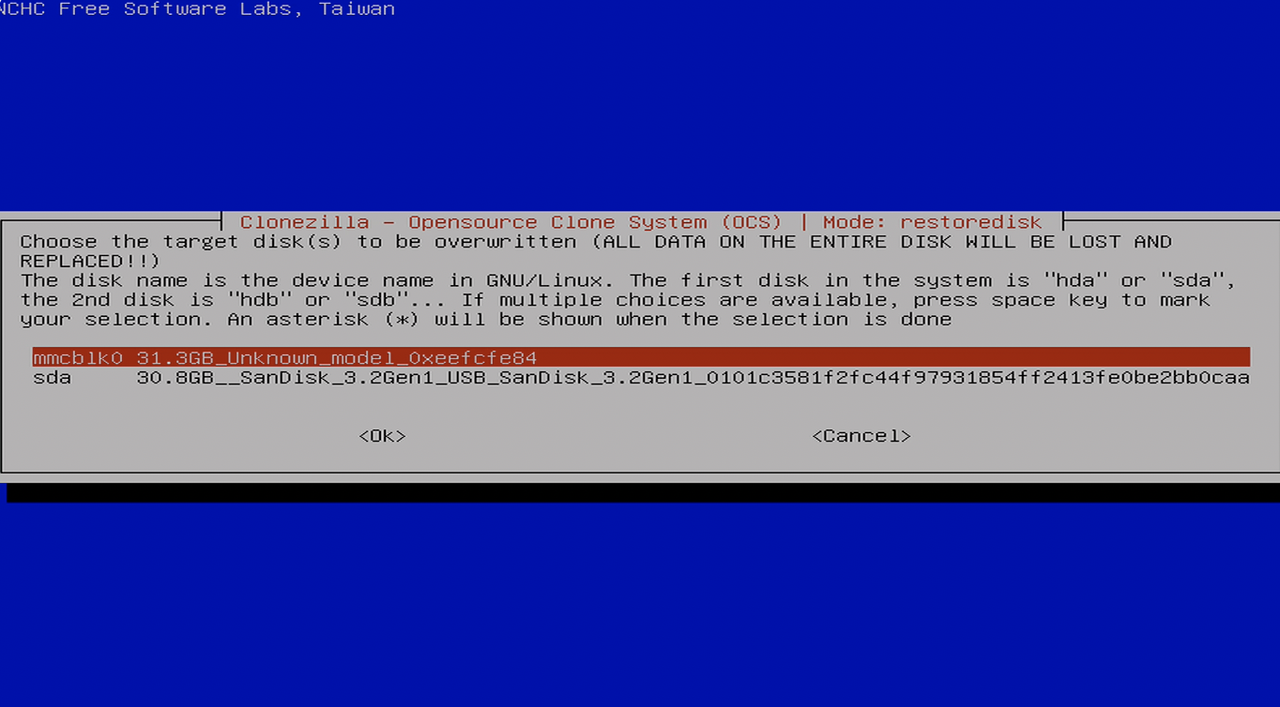
Next you’ll have to choose a disk to flash the image onto, choose the first option mmcblk0 (the onboard eMMC) and hit Enter twice.

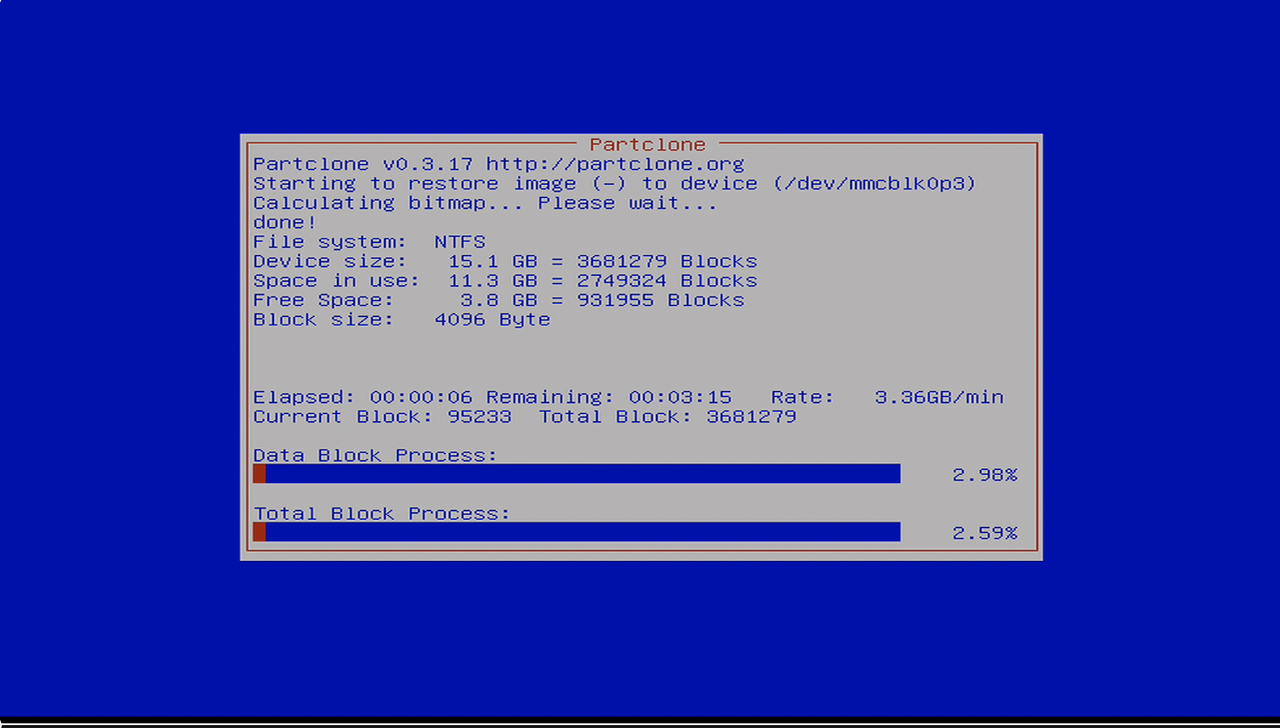
Next in the CLI, when prompted with warnings (your data will be lost, etc.) type y and hit Enter to confirm install. Wait a few minutes while the installation happens.

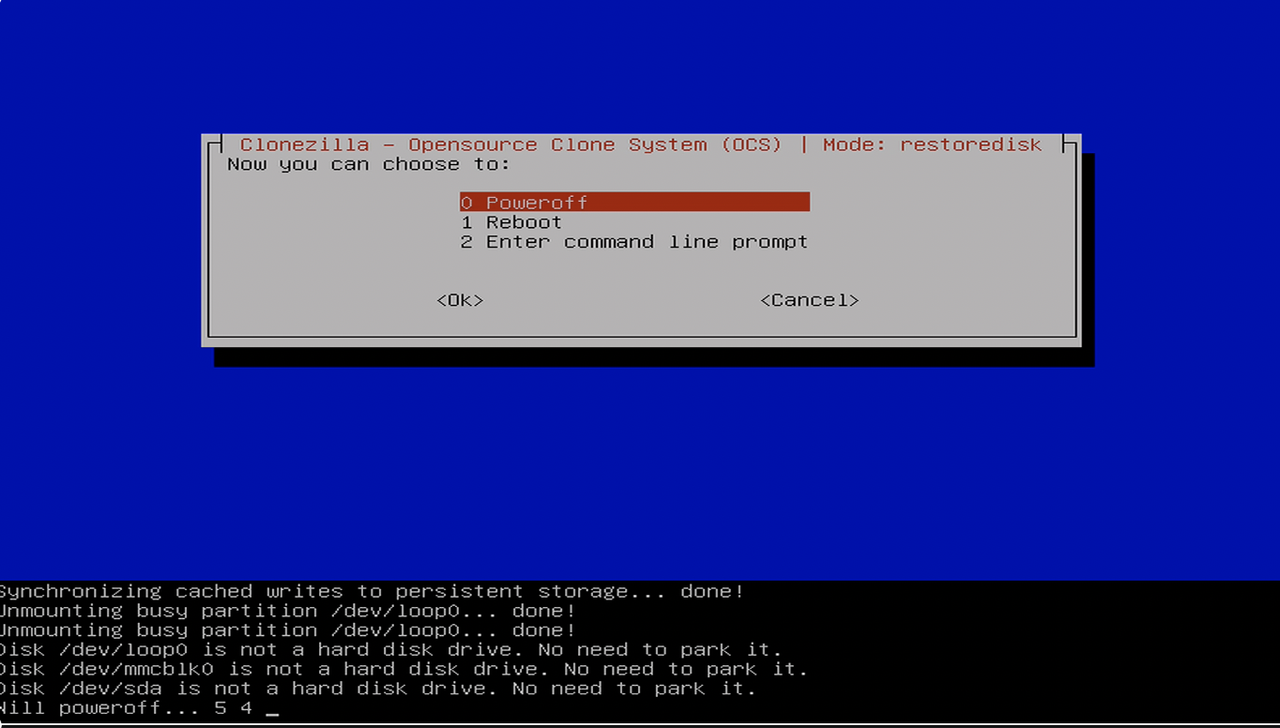
Once the install is finished, you’ll see another menu. Choose the first option Power off and hit Enter.

Once the countdown is complete, the ZimaBoard will shutdown. Confirm that the red light on the machine is off, unplug the power, USB drive and keyboard (you won’t need it anymore), and connect an ethernet cable to one of the network ports if you haven’t already. Then plug the power cord back in and give the ZimaBoard and CasaOS a few minutes to fully boot up essentially for the first time.
On a browser in the same local network, go to http://casaos.local and the CasaOS web UI should appear, prompting creation of a new user.