Setup self-hosted Jellyfin Media Server in Docker
Though Plex is a very popular media server for self-hosting, some open source enthusiasts prefer to use an alternative since Plex Media Server is not open source. A nice, simpler and admittedly less pretty alternative is Jellyfin. This guide will show you how to run it in Docker container.
Table of Contents
Installing Jellyfin as a Docker container
If you haven’t already, install Docker and all it’s dependencies quickly their official install script:
curl -fsSL https://get.docker.com | sh
Though Jellyfin has an official Docker image, if this is your first time running Jellyfin I strongly suggest you instead use the Linuxserver image, which is built and maintained by the Linuxserver community. I have run the Linuxserver image of Jellyfin without issue, and it seems that is also the case with most self-hosters.
Create a compose.yaml file, copy and paste the following:
---
services:
  jellyfin:
    image: lscr.io/linuxserver/jellyfin:latest
    container_name: jellyfin
    environment:
      - PUID=1000
      - PGID=1000
      - TZ=America/New_York
      - JELLYFIN_PublishedServerUrl=192.168.0.100
    volumes:
      - /opt/docker/jellyfin:/config
      - /mnt/media/tvshows:/data/tvshows
      - /mnt/media/movies:/data/movies
    ports:
      - 8096:8096
      - 8920:8920
      - 7359:7359/udp
    restart: unless-stopped
Let’s break down what each of these parameters do:
| Parameter | Function |
|---|---|
image | Here we’re using the latest version of the Linuxserver-maintained image. |
container_name | Optional, but you should give your containers a name for clarity. |
PUID=1000PGID=1000 | These env variable sets a UID and GID for Jellyfin and should match the owner of the volumes you are adding; check your UID and GID with the command id. |
JELLYFIN_PublishedServerUrl= | This will allow the server to be discoverable on your home network. Add this with your server’s IP to easily connect your devices to Jellyfin. Make sure to map UDP port 7359 for this to work. (See below.) |
ports | This will map ports on your machine (left of the colon) to ports inside the container (right of the colon) — optional in Linux but required in Windows and WSL. Port 8096 is for HTTP access, 8920 for HTTPS (optional) and 7359:7359/udp lets the server be discoverable on your local network when using the JELLYFIN_PublishedServerUrl parameter. (See above.) |
volumes | Here we’re mapping local directories (left of the colon) to directories inside the container (right of the colon), change this to your own local paths. |
restart | This tells Docker under what circumstances to restart the container when it is stopped — the options are no, always, on-failure and unless-stopped. |
If you’d like to use hardware acceleration, see this part of the Jellyfin documentation. If the machine you’re hosting Jellyfin on has an Intel CPU, there’s a good chance is supports Quick Sync and you should let Jellyfin use it. To do so, add the following option to your docker compose:
devices:
  - /dev/dri/renderD128:/dev/dri/renderD128
  - /dev/dri/card0:/dev/dri/card0
Once your compose file is ready, save it and exit the editor. Now from within the same directory as the compose.yaml is located, use the following command to install and start the container in the background as a daemon:
docker compose up -d
Configuring Jellyfin
Wait a minute while the container is downloaded and install. After completion, use the command docker ps to verify the container is up and running. You should see output similar to the below:
CONTAINER ID   IMAGE                                 COMMAND   CREATED         STATUS         PORTS                                                                   NAMES
7383028393f4   lscr.io/linuxserver/jellyfin:latest   "/init"   9 seconds ago   Up 7 seconds   0.0.0.0:8096->8096/tcp, 0.0.0.0:8920->8920/tcp, 0.0.0.0:359->7359/udp   jellyfin
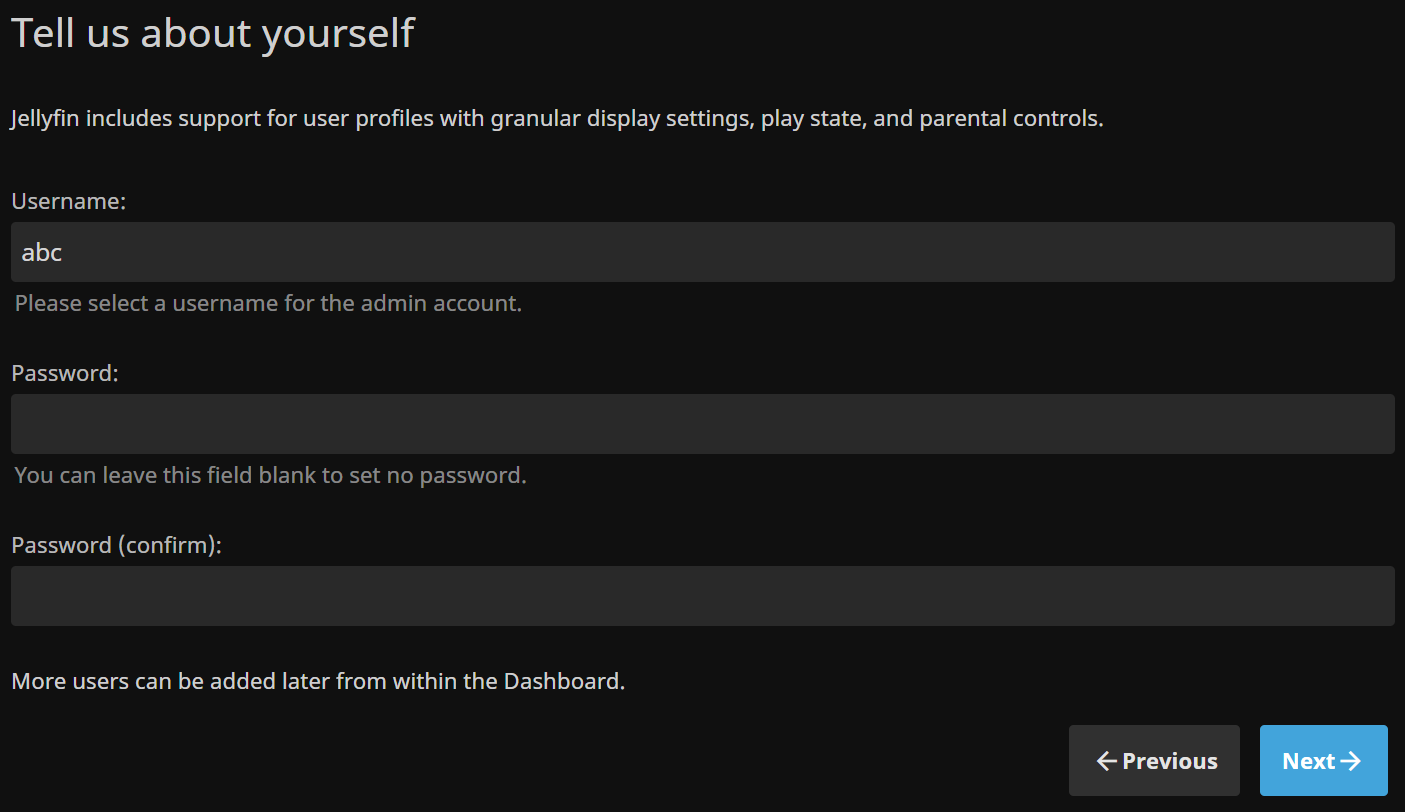
Good to go. Now to configure Jellyfin you’ll need to access it’s web UI, which by default is at (for example) http://192.168.0.100:8096. On the first page you’ll be asked to choose a language and can also use the Quick Start if desired, for purposes of this guide we’ll choose English and click Next. On the following page you can create a user and password (or you can use no password if preferred), create your login and click Next.
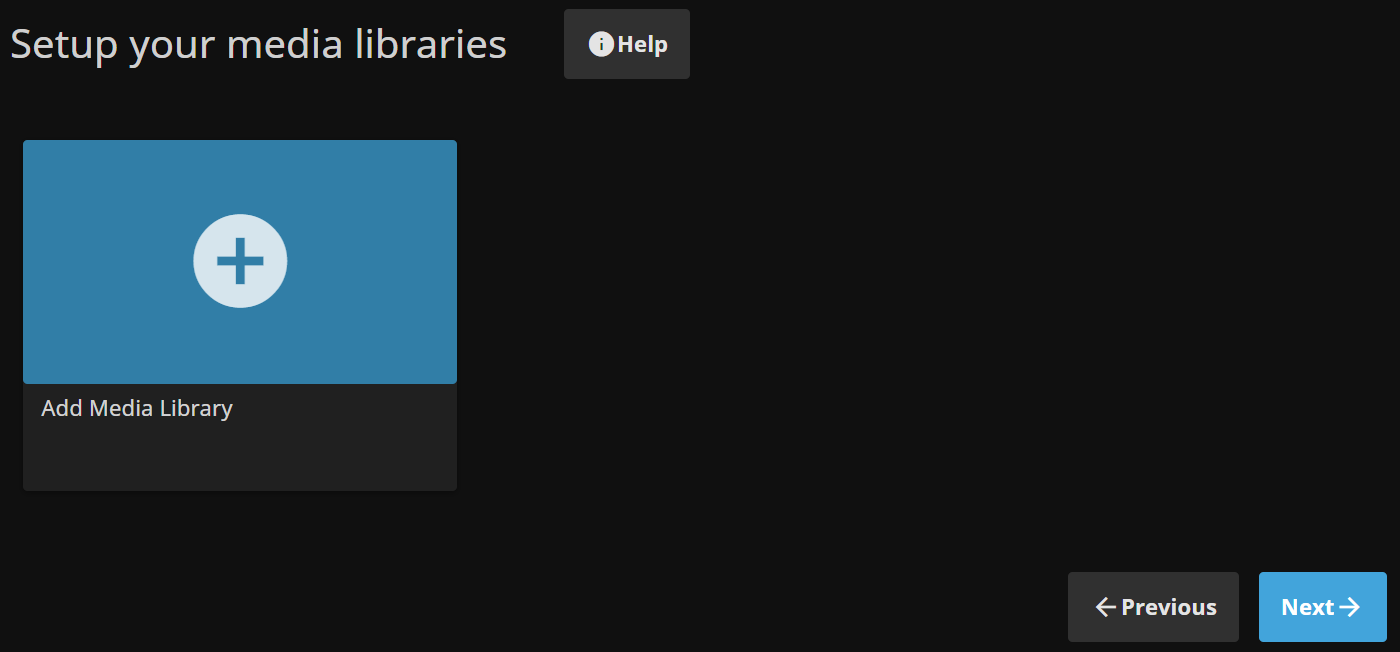
You’ll be taken to setup your media libraries, click on Add Media Library.
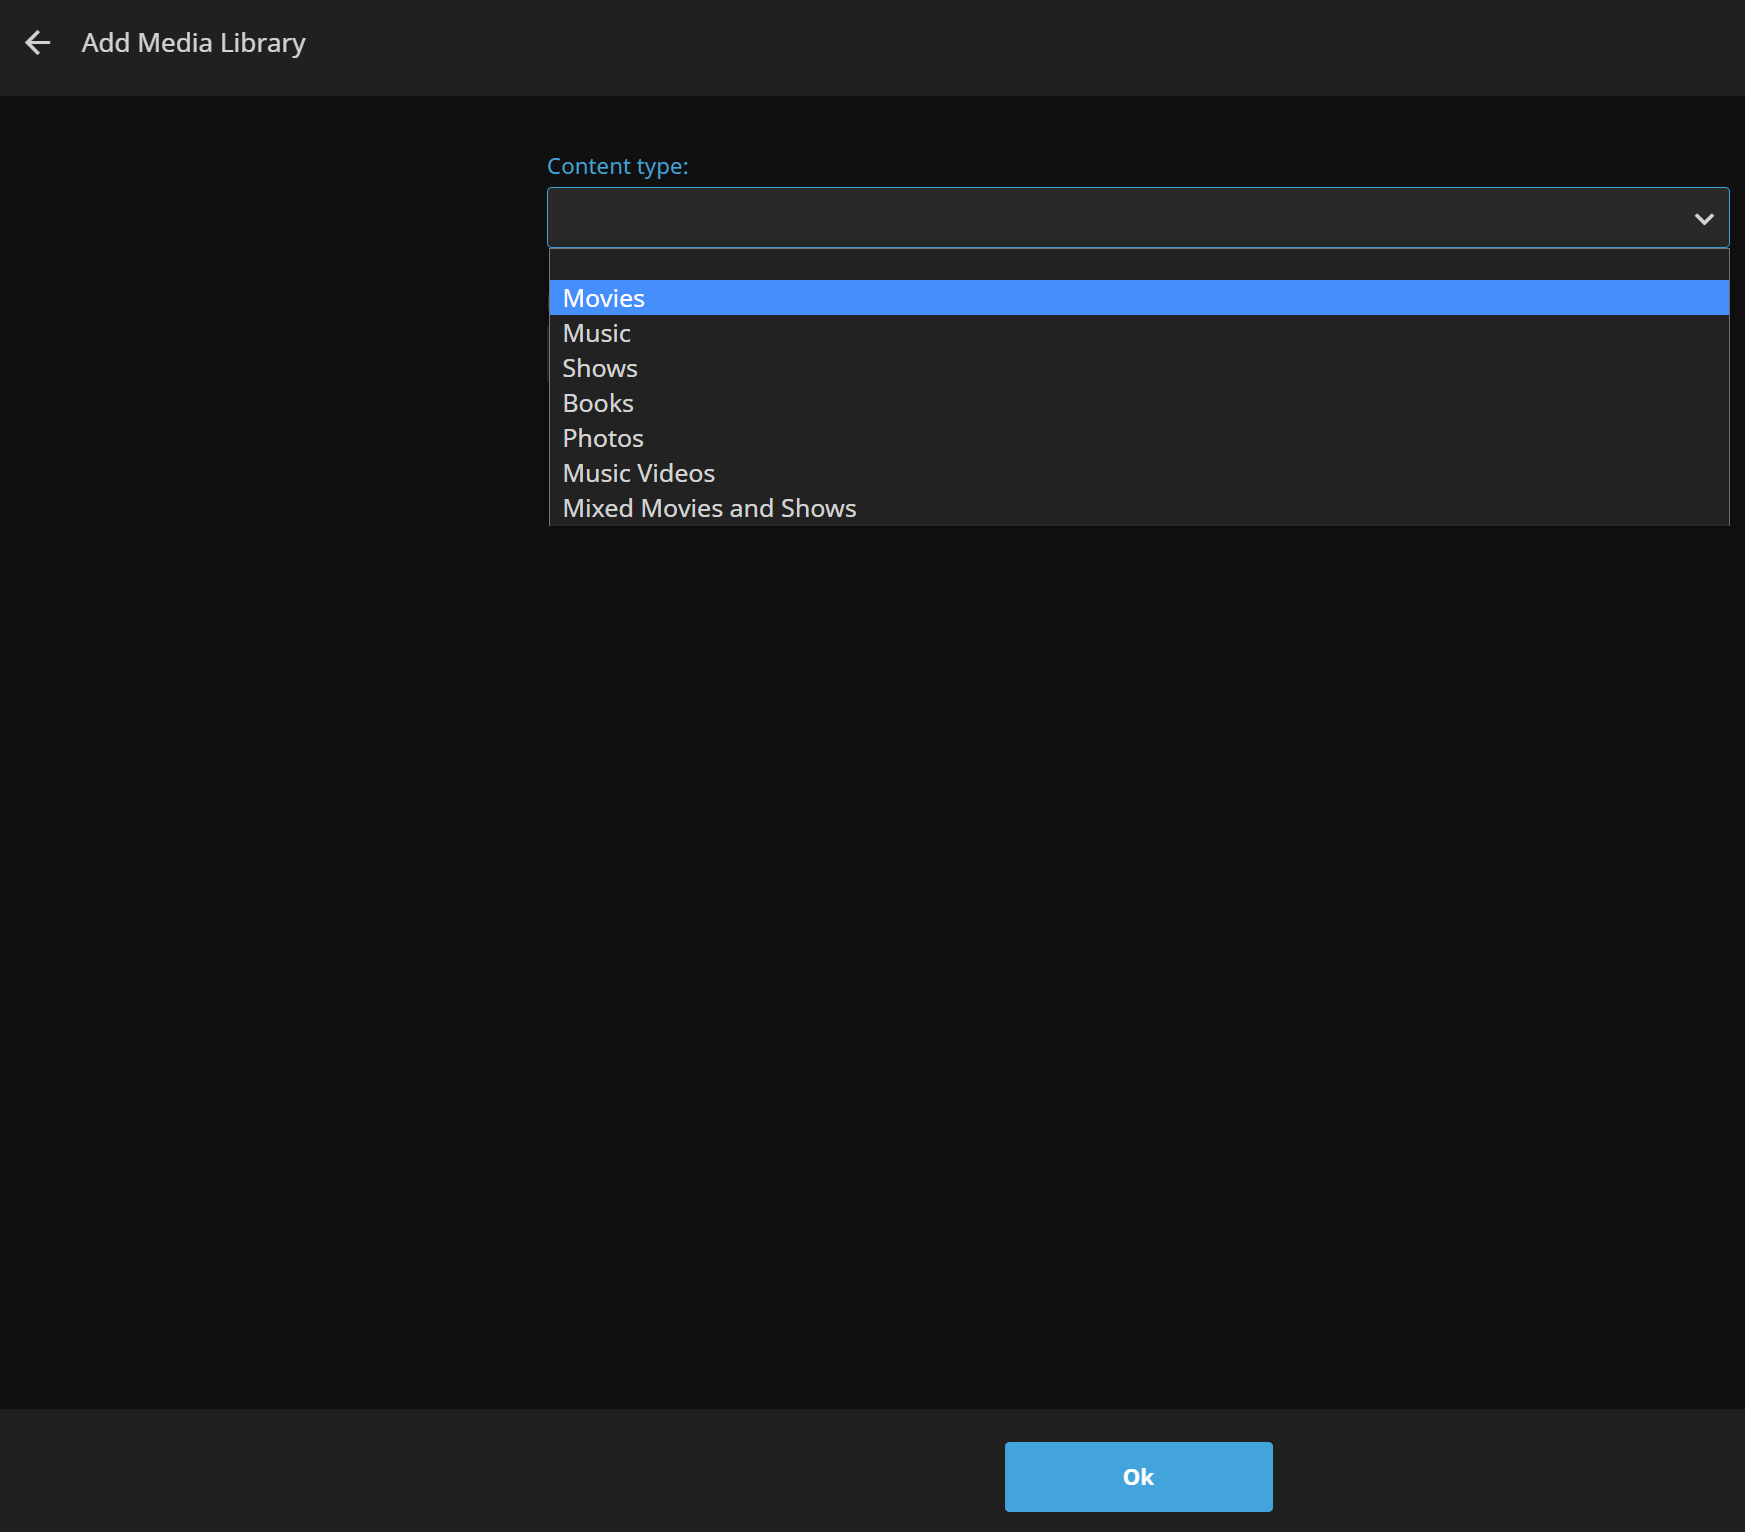
In the Content Type drop down menu, choose like kind of media you’re adding. For this guide we’ll choose Movies, then click Ok.
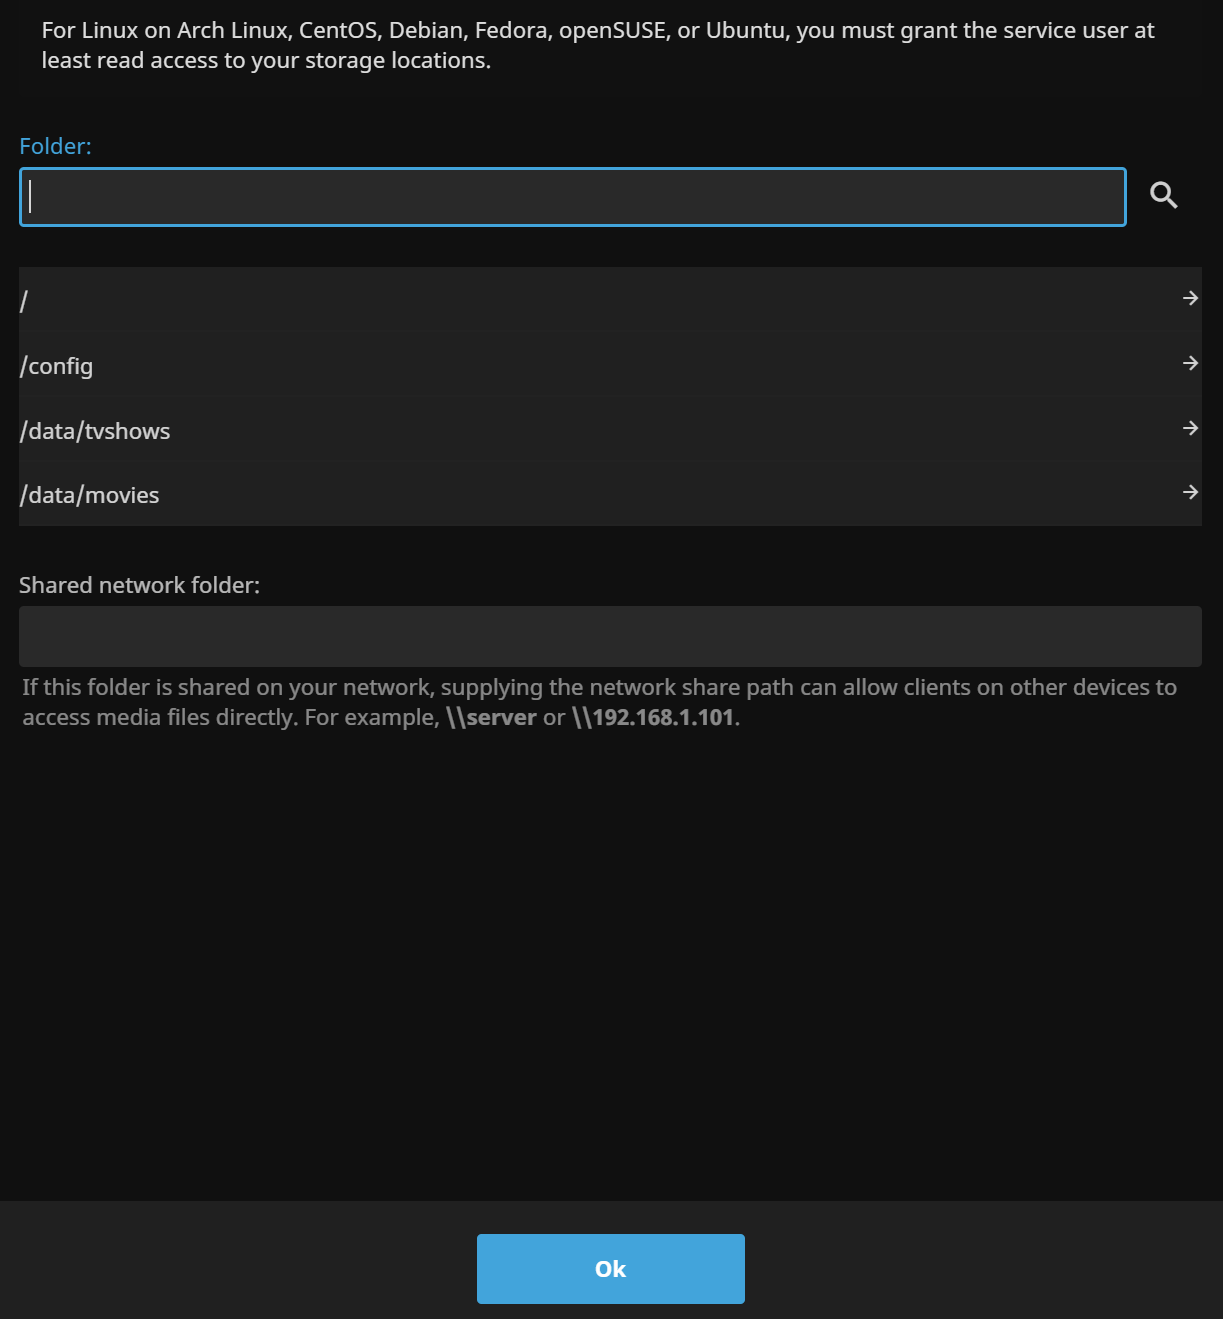
A series of options will appear, read through them and make your choices, or just leave the defaults if you don’t want to change anything. To add a folder to the library, click the Plus (+) button and you’ll get a pop-up where you can choose a folder. Choose from the list, or type out the path, and click Ok (You can also add a network share as the folder.)
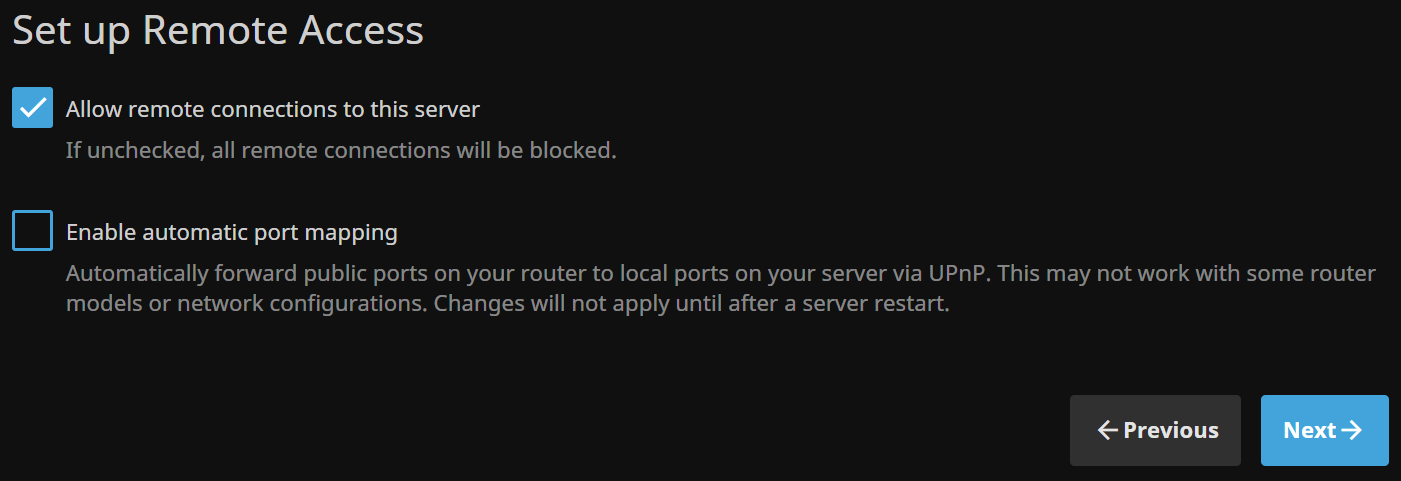
On the following page you can set up remote access to Jellyfin, meaning whether other devices will be able to access Jellyfin. Check the box Allow remote connections to this server, but leave unchecked Enable automatic port mapping unless you want to access Jellyfin from outside your network. (You’ll additionally need to forward port 8096 on your router to the server running Jellyfin. I don’t suggest it.) Then click Next.
Your movies should now appear within the Movies section of the Jellyfin UI. Repeat the process to add other directories for your TV, Music, Books, Photos and other libraries if desired. And you’re done! You can now watch jellyfin right in the web UI.
Theming the web UI with custom CSS
If you’d like to change the web GUI’s colors and vibe, you’ll need the Skin Manager community plugin. (These affect the web UI accessed via the browser only.) As per the directions on their GitHub:
- In jellyfin, go to Dashboard -> Plugins -> Repositories -> add and paste this link
https://raw.githubusercontent.com/danieladov/JellyfinPluginManifest/master/manifest.json - Go to Catalog and search for Skin Manager
- Click on it and install
- Restart Jellyfin
Use docker restart jellyfin and once the Jellyfin container has restarted, go back into the GUI, go to Dashboard -> Plugins and click on Skin Manager. Use the dropdown menu to pick a skin (my favorite is JellySkin), tweak any options if it has them, and click Set Skin. If it doesn’t switch to the new time right away, try a hard refresh with Ctrl + F5. Also, sometimes Nginx Proxy Manager the skins won’t work due to CSP issues. (I haven’t encountered this problem, but I have my reverse proxy set up without HTTPS and that may be why.)