Setup a Cloudflare Tunnel to securely access self-hosted apps with a domain from outside the home network
Cloudflare Tunnels have been around for a few years and are well regarded alternatives for VPNs or port-forwarding on a router. They are often used to expose access to self-hosted apps from outside the local network with minimal config or hassle. Here's how it's done.
Table of Contents
Pre-Requisites
This guide is assumes you already have a Linux machine with Docker installed and a container you want to expose up and running. For the examples below I’ll be using Navidrome because that’s what I set this up for in the first place and it just works. However, most self-hosted apps should work the same if you access it at, for example, 192.168.0.100:4533.
Apps that have to be accessed through a specific path (like /admin or /web) and have no redirect from the index page may act weird when it comes time to proxy the tunnel. I always run into this issue with Ubooquity in particular and haven’t figured out how to fix it. I won’t be trying to deal with that here.
The process of setting up and securing a Cloudflare Tunnel is a lot of steps, so I’m basically paraphrasing the Cloudflare Zero Trust Docs. When in doubt, refer back to them.
Add a domain to Cloudflare
If you purchased your domain with Cloudflare, you can skip this section since it will be auto-configured. If already own a domain from another registrar, like Namecheap or Porkbun, follow these instructions to add it to Cloudflare:
-
Log into Cloudflare and you’ll be in Account Home, click the + Add a domain button.
-
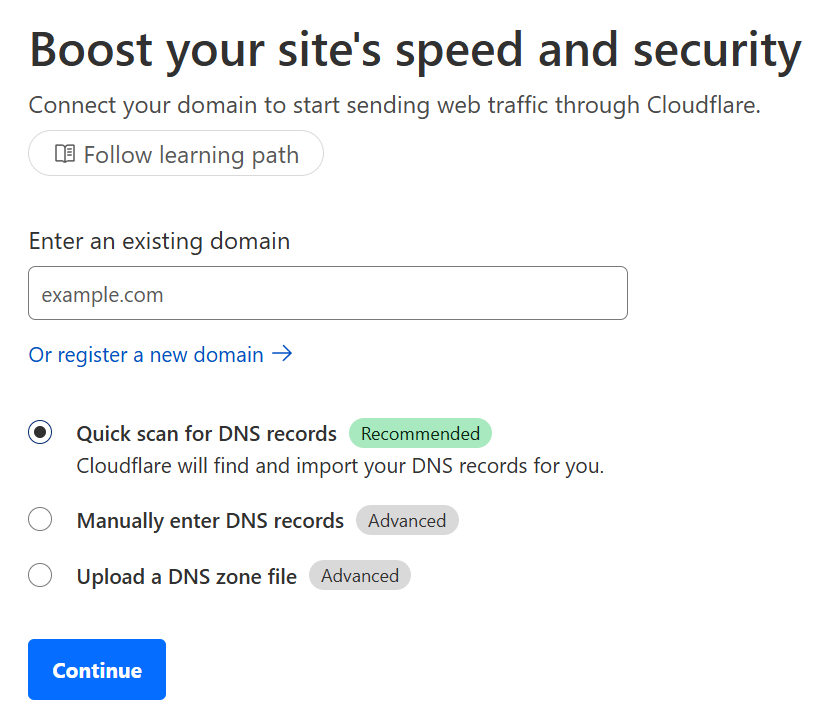
Enter your domain, leave Quick scan for DNS records selected, and click Cotinue.
- Click on the Free plan at the bottom and click Continue.

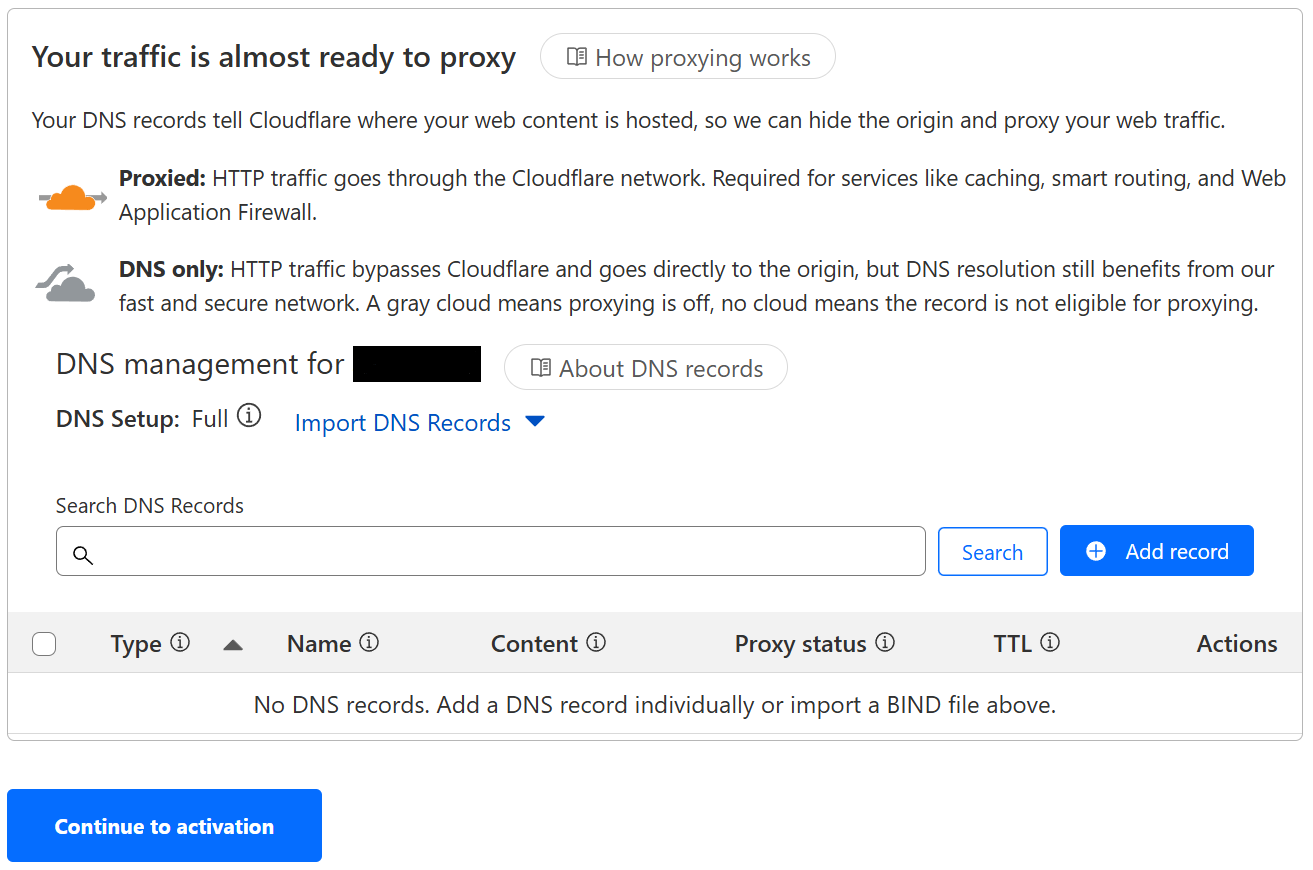
- You’ll see your DNS records, if there are any. Don’t worry about this right now and click on the Continue to activate button.
- You’ll see a pop-up window saying you should set your DNS records now, click on Confirm.

-
Now you’ll be provided some instructions to update the nameservers on your domain’s registrar, open a new tab and follow those instructions. Once you’ve added the Cloudflare nameservers at your registrar, go back to Cloudflare and click on Continue.
-
Now you’ll have to wait a few minutes for the changes to propagate, then click on Check nameservers and reload the page. If it’s still shows Pending next to the domain at the top, just keep waiting and reload again after a few more minutes.
-
Once the domain is Active, you’re ready
Create the Cloudflare Tunnel
In the Cloudflare dashboard, from your domain’s Overview page, click on Access on the sidebar, and then on the next page click Launch Zero Trust. Once you’re in the Zero Trust dashboard, do the following:
- On the sidebar, go to Network and choose Tunnels from the dropdown.
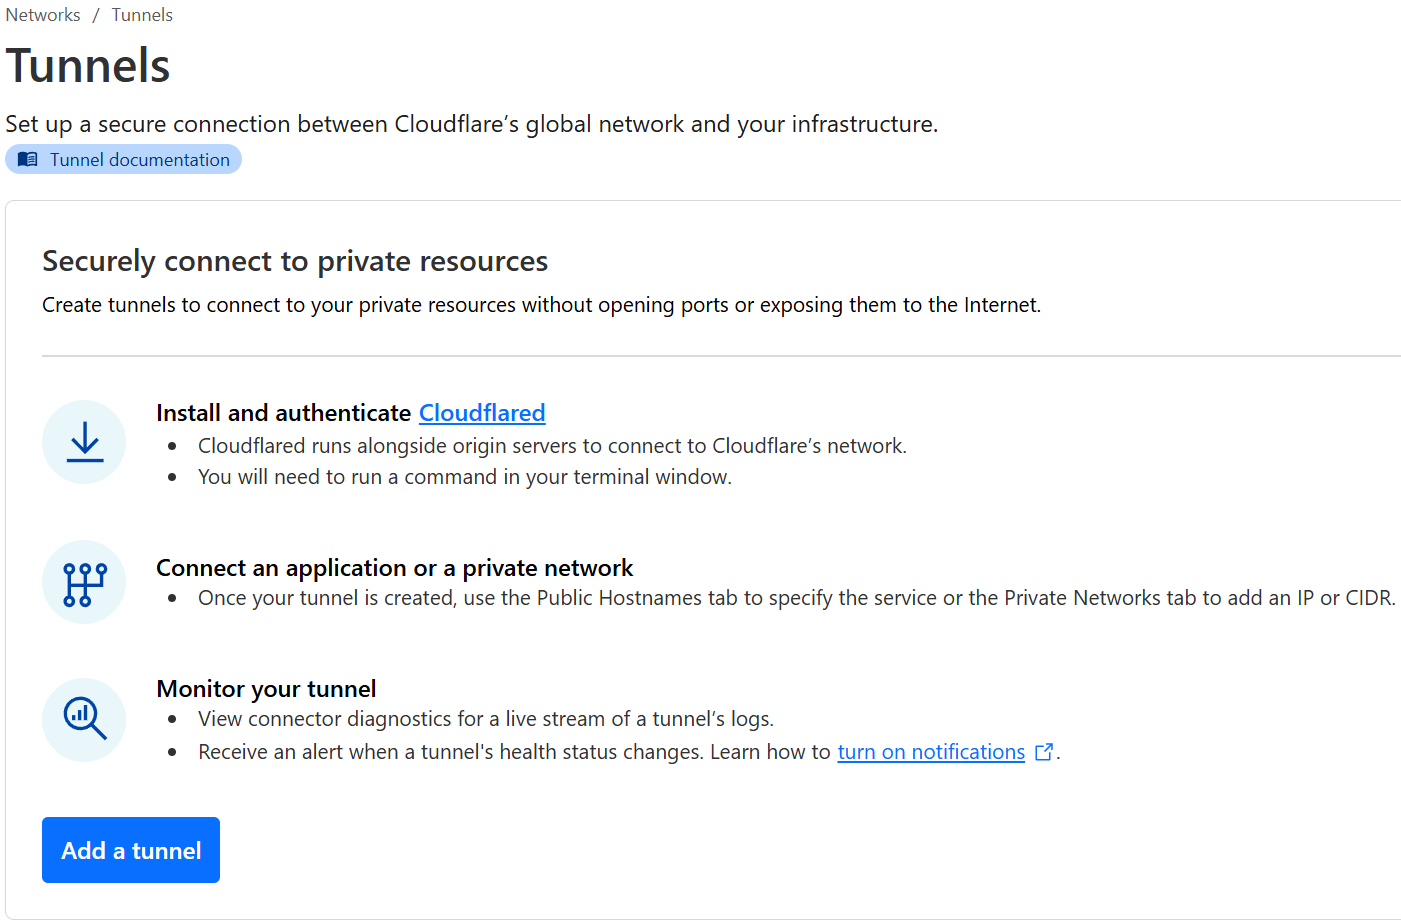
- Click on Add a tunnel, then on the next page choose Select Cloudflared.
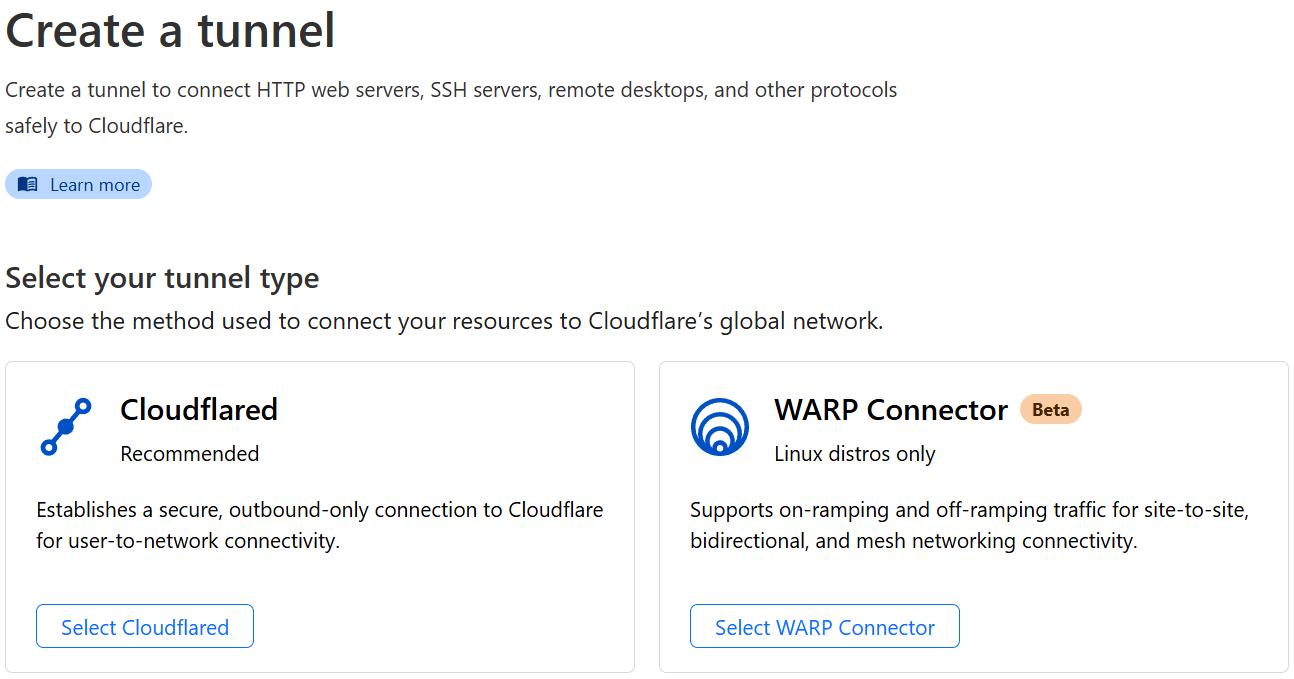
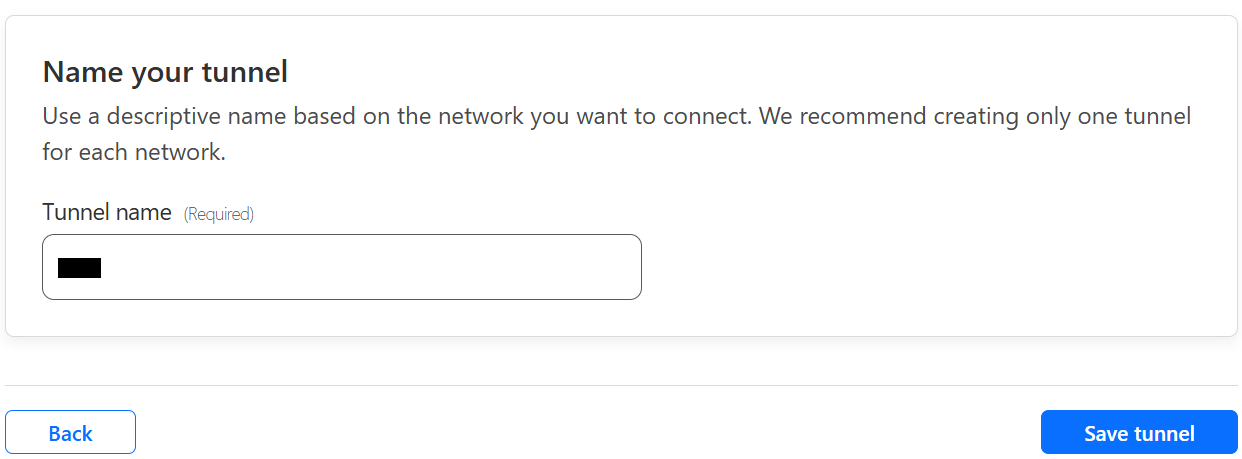
- On the following page name your tunnel, then click Save tunnel.
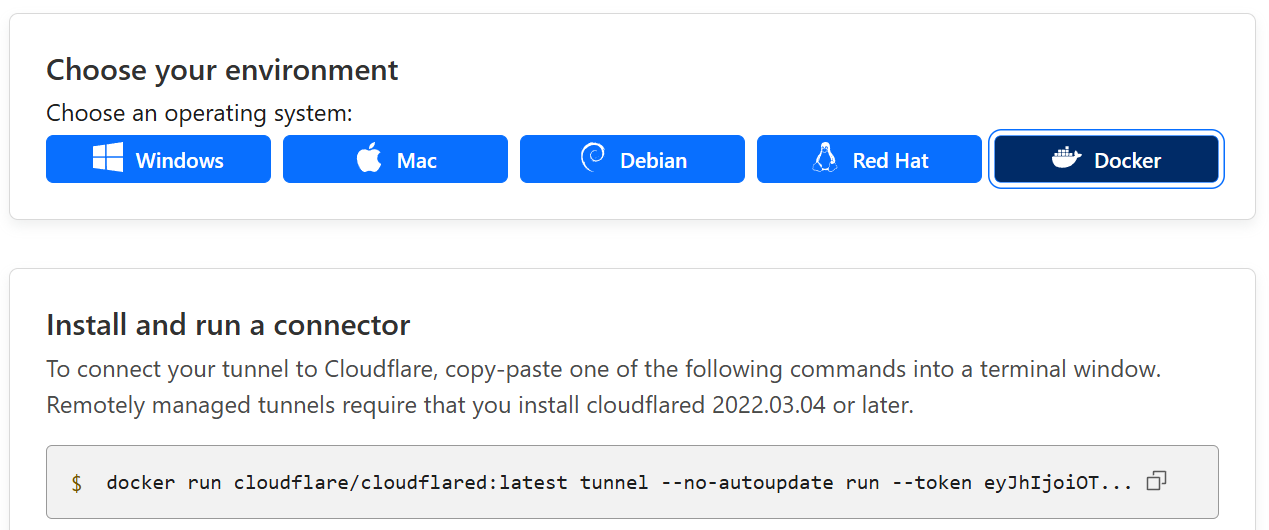
- Next you’ll be given a
docker runcommand to install and run the cloudflared connector. You can just copy and paste this into your terminal to run the tunnel, but if you prefer to usedocker composeinstead (and I do), all we will need from here is the tunnel token.
- To run this in
docker compose, first create acompose.yamlfile and we’ll add both Navidrome and Cloudflare Tunnel to it:
services:
  tunnel:
    container_name: tunnel
    image: cloudflare/cloudflared
    command: tunnel run
    environment:
      - TUNNEL_TOKEN=<tunnel-token>
    restart: unless-stopped

  navidrome:
    container_name: navidrome
    image: deluan/navidrome:latest
    volumes:
      - <path-to-local-directory>/navidrome:/data
      - <path-to-local-directory>/music:/music:ro
    environment:
      ND_BASEURL: ""
      ND_SCANSCHEDULE: 1h
      ND_SESSIONTIMEOUT: 24h
      ND_LOGLEVEL: info
    network_mode: host
    depends_on:
      - tunnel
    restart: unless-stopped
- Add the tunnel token from Cloudflare to the
TUNNEL_TOKEN=environmental variable in the compose file. Also customize your local data and music directories for Navidrome. Save the file and use the below command:
docker compose up -d
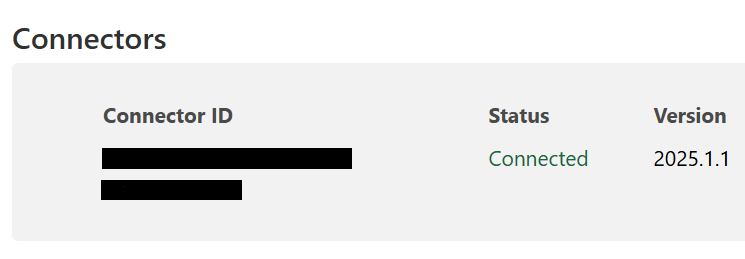
- Once the containers are up and running, you should see in Cloudflare that your connector status at the bottom is Connected. Once the tunnel is Connected, click the Next button.
-
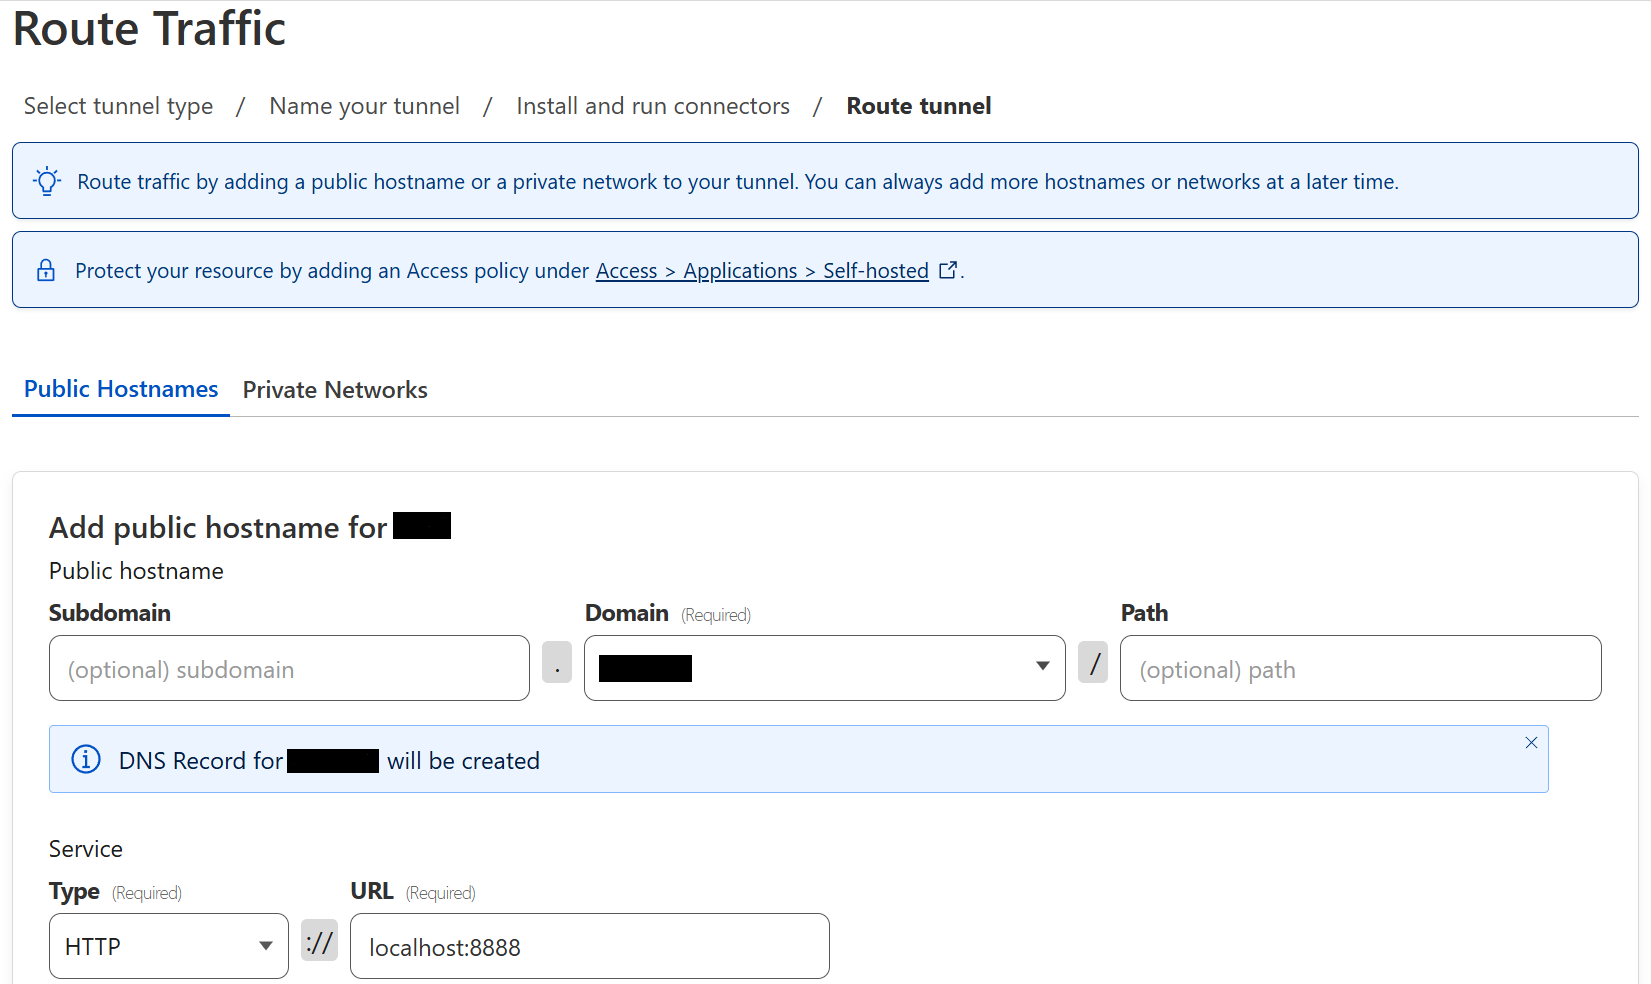
Now you’ll be in the Route Traffic page, under the Public Hostnames we have to add some things. First, add your desired Subdomain, for example,
music. (You will then access Navidrome athttps://music.your-domain.com.) -
For Domain type in
your-domain.com. (Make sure the domain is already active in Cloudflare!) Leave the Path empty. -
Under Service, for Type select
HTTP(not HTTPS) from the dropdown menu. -
For URL, put the full LAN (internal) IP address of the machine that will host the site, and append the Navidrome network port — for example
192.168.0.100:4533. (Don’t uselocalhost:4533despite what the example says, that never works for me.)
- When done filling everything in, click Save.
Now you will be back at the Tunnels page. Under Your tunnels, the tunnel you just created should show Healthy status.

All done! Go to https://music.your-domain.com and you should reach the Navidrome UI! However, you’re not the only one with access, technically anyone with the URL can reach it unabated.
Although Navidrome, like many self-hosted services, has username and passwords for login, you can also put authentication services in front of the tunnel to stop unauthorized visitors from even reaching your app. Read on…
Configure OAuth with Google
It’s been a while since I wrote this post and I don’t use this set up anymore (I switched to Tailscale), so if the rest of the guide doesn’t work for you please let me know and I’ll update it in the future!
You’ll need a Google account to set this up, which you already do with Gmail. You’ll be using that email to do some stuff on Google Cloud Platform. It’s totally free for this use case.
-
Go to Google Cloud Platform and go to Console at the top-right. On the next page click the dropdown menu at the top-left and go to New Project. Name the project and click Create.
-
On the project home page, go to APIs & Services on the sidebar and select Dashboard.
-
On the sidebar, go to Credentials and select Configure Consent Screen at the top of the page.
-
Choose
Externalas the User Type. Since this application is not being created in a Google Workspace account, any user with a Gmail address can login. -
Name the application, add a support email, and input contact fields. Google Cloud Platform requires an email in your account.
-
(Optional) In the Scopes section, add the
userinfo.emailscope. This is not required for the integration, but shows authenticating users what information is being gathered. -
Return to the APIs & Services page, select Create Credentials -> OAuth client ID, and name the application.
-
Under Authorized JavaScript origins, in the URIs field, enter your team domain. For example:
https://<your-team-name>.cloudflareaccess.com
If you don’t know it, go to the Cloudflare Zero Trust dashboard -> Settings -> Custom Pages to see your team domain.
-
Under Authorized redirect URIs, in the URIs field, enter your team domain followed by this callback at the end of the path:
https://<your-team-name>.cloudflareaccess.com/cdn-cgi/access/callback -
Google will present the OAuth Client ID and Secret values. The secret field functions like a password and should not be shared. Copy both values.
-
In Zero Trust, go to Settings -> Authentication.
-
Under Login methods, select Add new. Choose Google on the next page.
-
Input the Client ID and Client Secret fields generated by Google Cloud Platform previously.
-
(Optional) Enable Proof of Key Exchange (PKCE). PKCE will be performed on all login attempts.
-
Select Save. Make sure to use the Test link to make sure it works.
Create an access policy
Now that the OAuth provider is set up, we need make use of it with Access Policies.
-
In Zero Trust, go to Access -> Applications -> Add an application.
-
Select Self-Hosted. Under Application Configuration, name the application
Navidromeand choose session duration. Add the sub-domain you want to use (e.g.music) and the domain you transferred to Cloudflare earlier.
Ignore the warning about no DNS record found for this domain. Cloudflare is complaining about no A/AAAA records, but we don’t need them for access via Tunnel.
-
(Optional) Leave the Application Appearance the same, and if you’d like select Custom Logo and paste in the Navidrome logo URL:
https://raw.githubusercontent.com/navidrome/navidrome/master/resources/logo-192x192.png -
Leave the Block pages set to
Cloudflare default, add a Cloudflare error text if you’d like. (It has to be 75 characters or less.) -
Under Identity providers uncheck
Accept all available identity providers, then checkInstant Auth. -
Click the Next button at the bottom-right.
-
Type in a Policy name, as Action choose
Allow, and leave Session duration as-is. -
Under Configure rules -> Include, select Email and add an email address to Value.
-
(Optional) If you like even more security, click + Add require and choose Country as selector and your home country as the Value.
-
(Optional) You can activate Purpose justification which apparently emails an approval email each time there is a login, like a 2 factor auth. I don’t bother with this, so I don’t really know.
-
Click the Next button.
-
Unless you know what you’re doing, leave the all the additional settings alone. Just scroll to the bottom and click the Add application button to finish.
Now when you go to https://music.your-domain.com you should be met with a Google account login page. Login with the email you added and you should hit the Navidrome UI.
If you get any DNS errors when trying to access your domain after adding OAuth with the above steps, but didn’t have any issues before that, you may be hitting your ad blocker. I didn’t have issues with Pi-Hole, but when testing behind NextDNS I did get
NXDOMAINerrors.
See this post on NextDNS Help Center. TLDR: Try disabling DNSSEC for your domain on the Cloudflare dashboard and see if that resolves the issue. (I have not tested it.)
Use WAF to whitelist your IP and block all others
For even more security, or maybe even in lieu of setting up Oauth, you can use Cloudflare’s Web Application Firewall to whitelist specific IP addresses and block the rest. This is totally optional, but I will show you how to do it.
-
On the Cloudflare dashboard, go to your domain, then click Security on the sidebar and choose WAF from the dropdown.
-
You’ll be in WAF’s Managed rules page, click on Custom rules.
-
In the Custom rules page, scroll down to Rules templates, look for Zone lockdown and click on Use template.

-
The template have two rules. On the first one leave the Field as IP Source Address, change Operator to is not equal to, and for Value enter your public IP address. (You can find out what it is here.)
-
Press the X next to the second URI Path rule to delete it, we don’t need it. Scroll down.
-
Under Then take action… choose Block as the action. Now scroll to the bottom and click on Deploy.
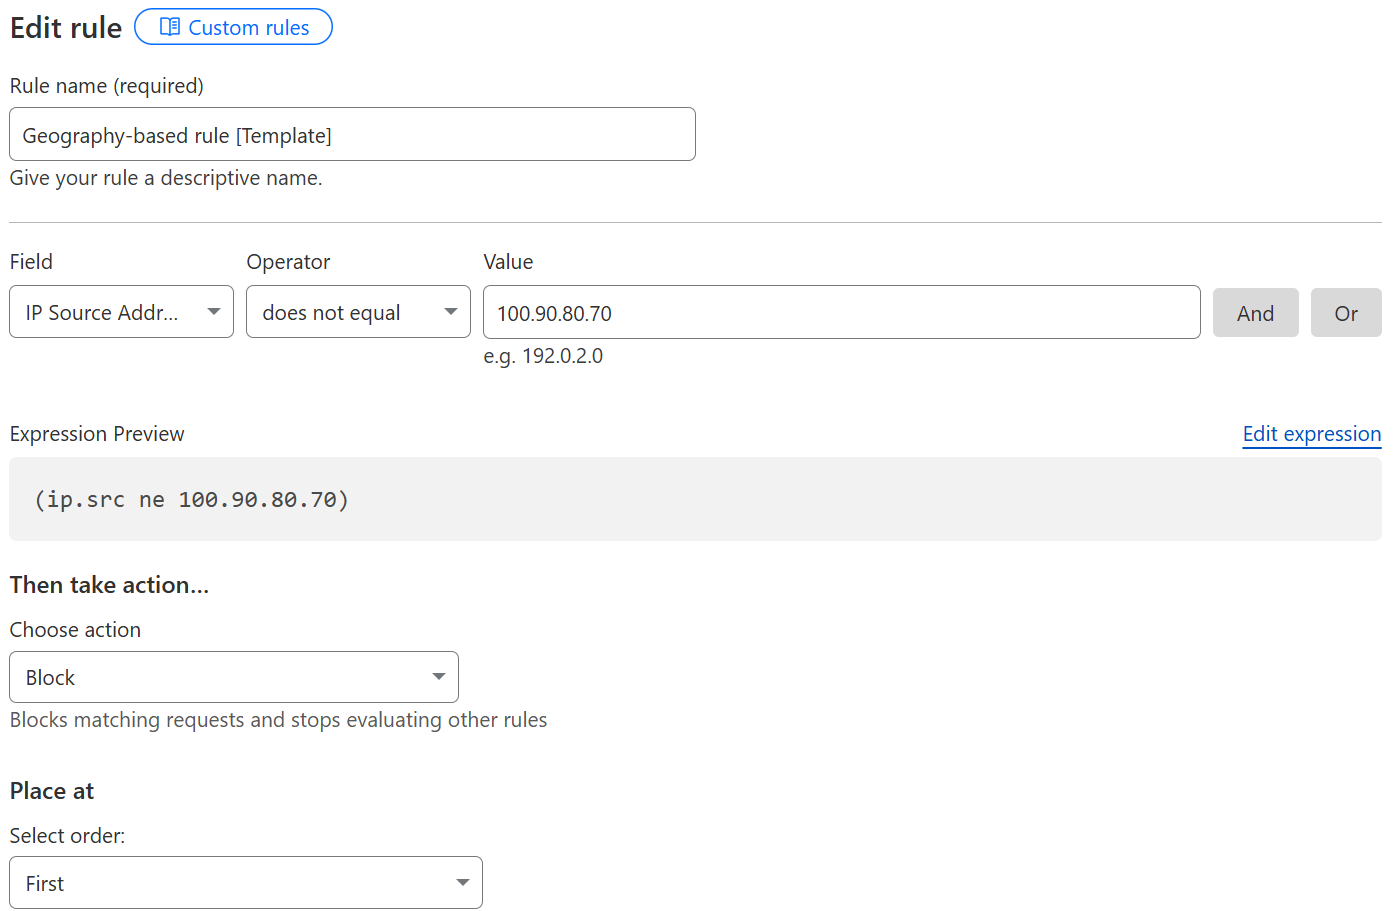
Now only your IP address should have access to music.your-domain.com. Be aware that if your IP address changes (and is common with residential ISPs unless you have a static IP), you will need to keep track of that and update the rule accordingly.
It is possible to dynamically update DNS records in Cloudflare via API or third-party tools, but I have not gone down this particular rabbit hole, so you’re on your own there for now.
References
- Cloudflare Docs - Add a site
- Cloudflare Docs - Tunnels
- Cloudflare Docs - Routing traffic to a tunnel
- Cloudflare Docs - Identity
- Cloudflare Docs - Policy Management