Set up PhotoSync app to backup photos from your phone to an SMB share on your home server
Google Photos began limiting free storage back in 2021, limiting you to 15 GB of storage when uploading photos in their original size uncompressed. Rather than wait and see if I hit the cap, I decided to try replacing Google Photos with a self-hosted solution. Here's how I did it.
Table of Contents
Though the PhotoSync app is available on iPhone as well as Android, I have an Android phone and so I have only done this on Android. It’s safe to assume configuring PhotoSync on iPhone to connect to your NAS will be similar, if not exactly the same.
Caveats and Pre-Requisites
The method I describe below requires that your phone with the PhotoSync app be connected to the same Wi-Fi network as the server that you will be transferring your photos to, or have access to the server via Tailscale or other similar solution. Also, the server must already be configured with a Samba share. (See here how to set up a Samba share on Linux.)
Finally, using the SMB option to transfer photos requires the NAS Add-On for PhotoSync, which costs $2.49 by itself. (You also have the option of spending a bit more on the Bundle Add-On, which comes with the NAS Add-On as well as the Auto-Transfer and Cloud Add-Ons, but those are not necessary for what we’ll be setting up.)
Configure PhotoSync
In the PhotoSync app, tap the gear icon at the bottom-right corner to enter the Settings.
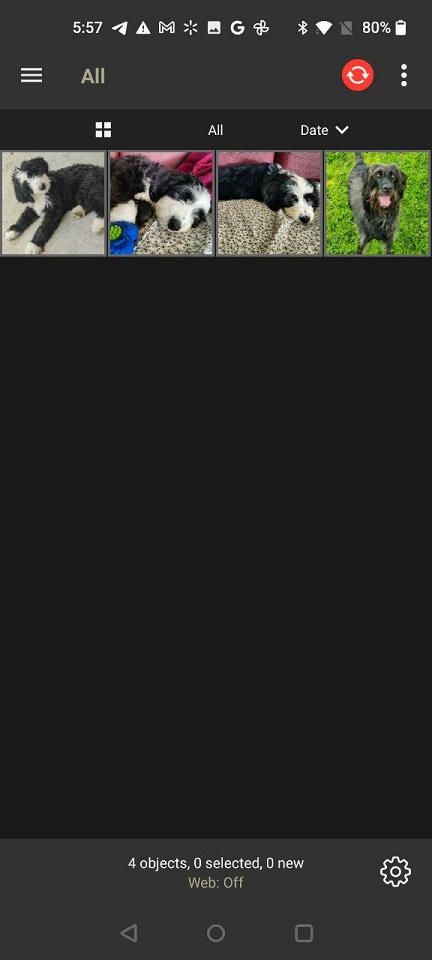
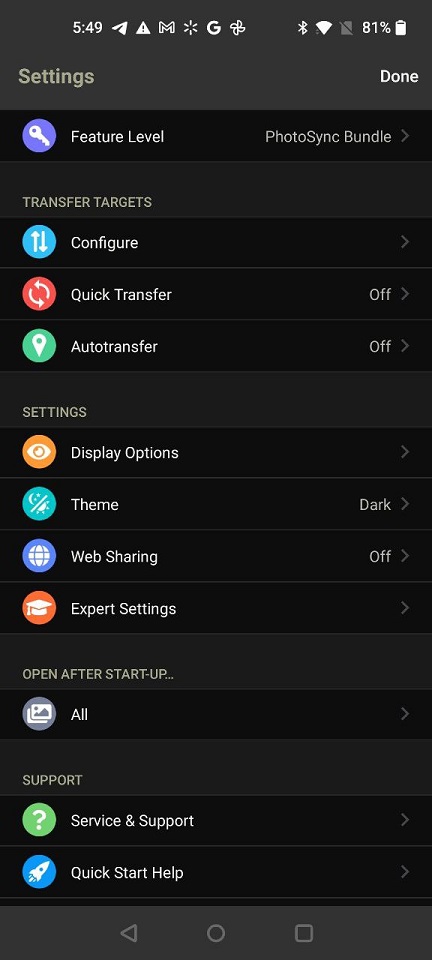
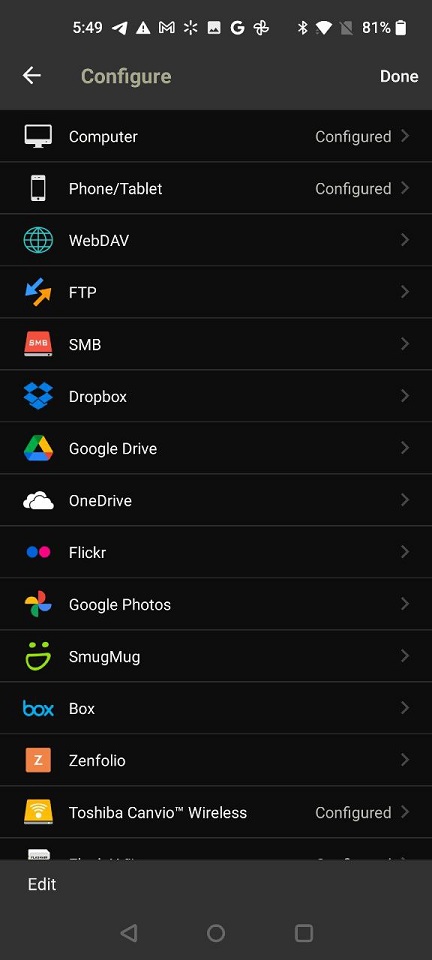
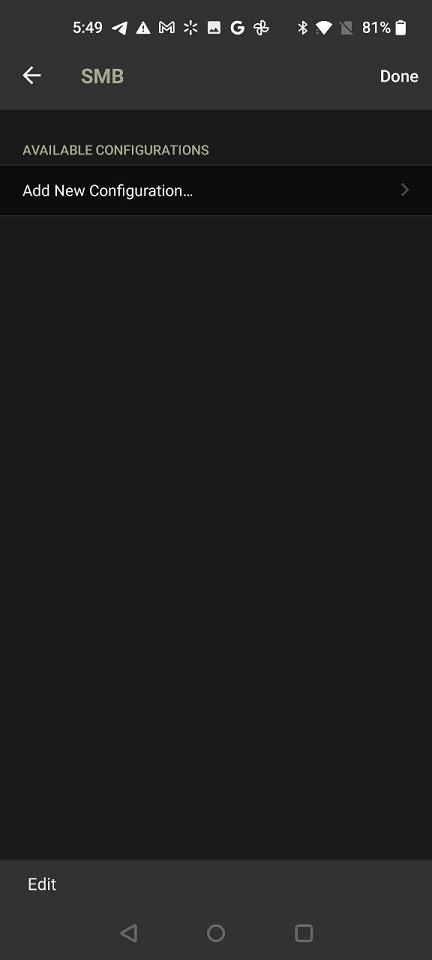
Under Transfer Targets tap on Configure. On the following page choose SMB from the list, then tap Add New Configuration.
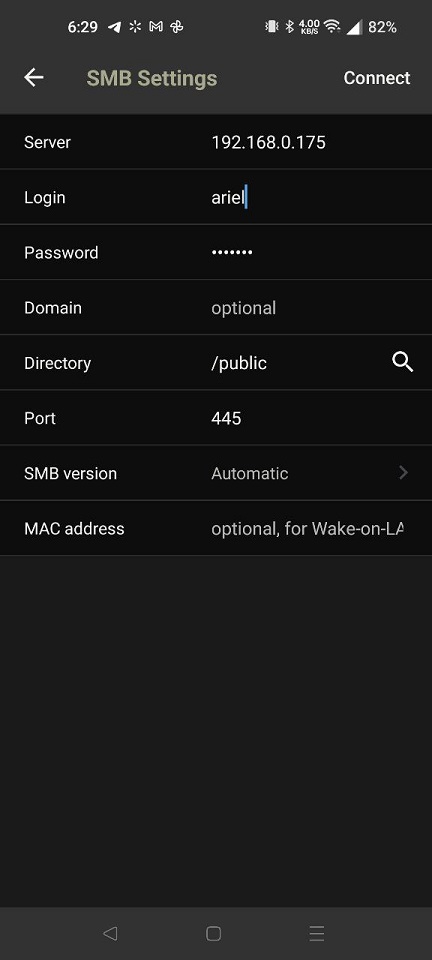
Enter the IP address of the server where the Samba share is, enter the login and password (assuming you have it set up that way), then tap the magnifying glass button next to Directory. The app should automatically show any Samba shares already set up on the server, tap on the one you want to use. Next tap on Connect at the top-right corner and if everything works correctly, you should be sent to the SMB target page.
Now under FOLDER SETTINGS tap on Destination Folder and pick a directory in the share, if you’d like, or just use the Share’s root directory if you prefer, then tap Select on the top-right.
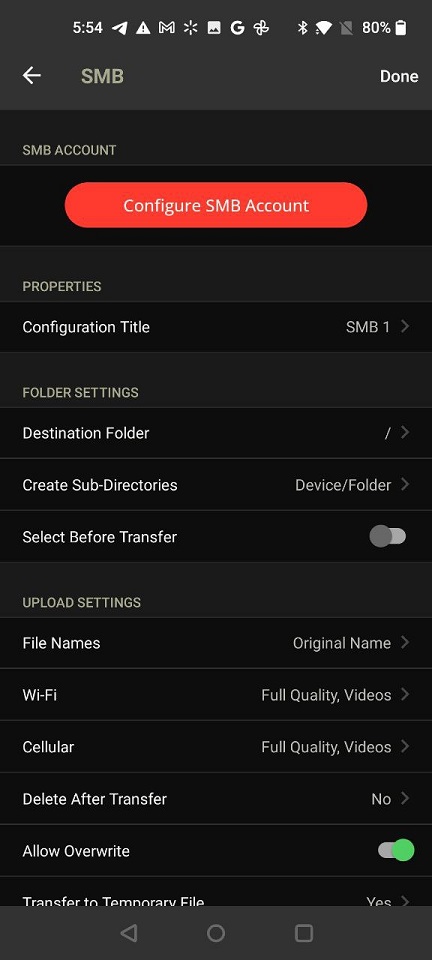
The rest of the settings you can set to your liking. If you haven’t gotten any errors, everything should be working as intended. Tap on Done to return to the app’s main page.
Transferring photos to the Samba share
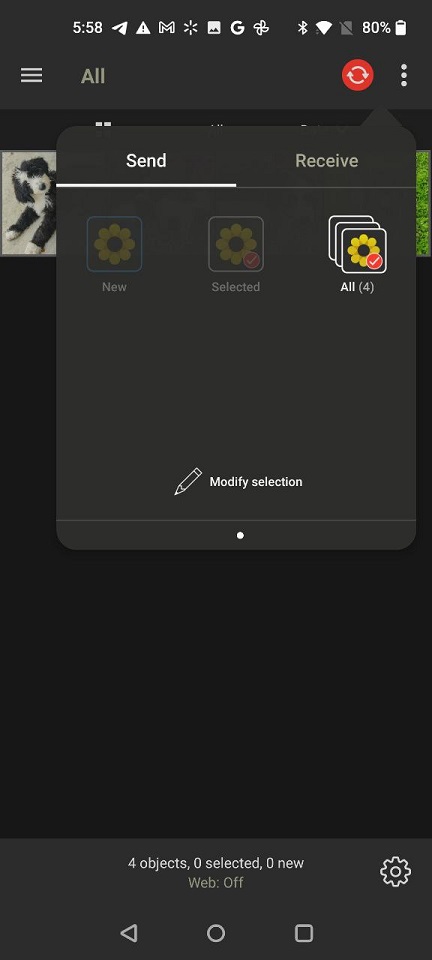
Back on the main page, tap the red transfer icon at the top, tap All (or you can tap individual photos and choose Selected), then tap SMB.
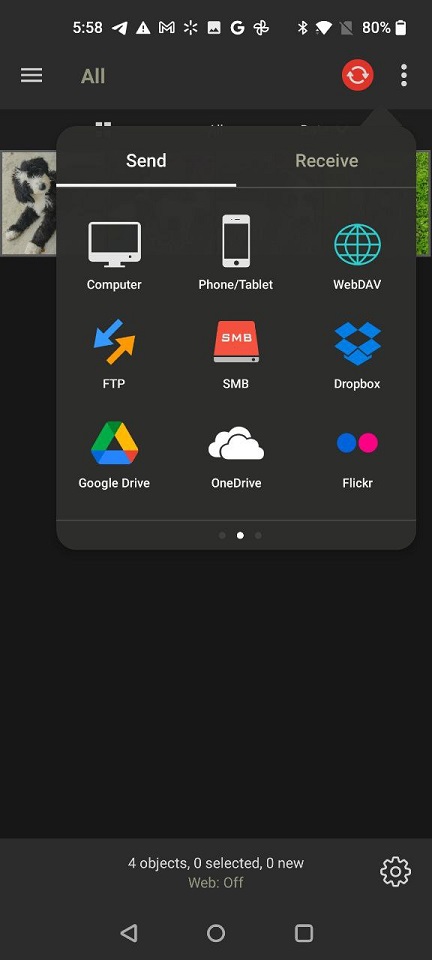
Tap on the directory to transfer your photos into (keep in mind Destination Folder and Create Sub-Directories in the SMB Account setting from earlier) and tap Select, the photo transfer should begin.
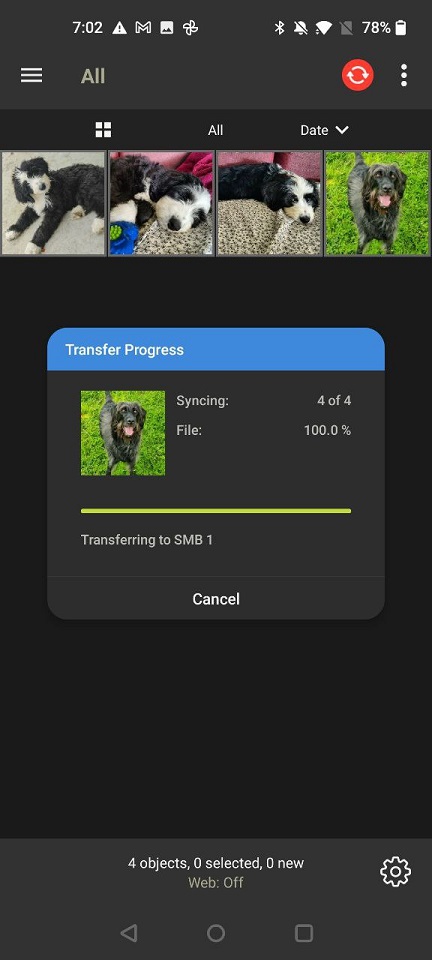
All done! Now you can manually sync new photos from your phone to your NAS at any time by opening the app and repeating the last set of instructions above.
Next, we’ll set up background auto-transfers, but you’ll need optional the Auto-Transfer Add-On.
-
In the PhotoSync app, tap the gear icon at the bottom-right corner to enter the Settings, and click on Autotransfer.
-
Click on Target and choose SMB. (No further configuration should be required if you had already set up SMB.)
-
Next click on Connection and choose Wi-Fi, and for Autotransfer from choose All or your preferred albums.
-
Finally, under Autotransfer Trigger click on the Change Trigger button, and pick your desired trigger — I like to set it so transfers occur when I connect a charger.